Xiaomi Mi Notebook Pro MacOS Catalina Installation Guide || ENGLISH
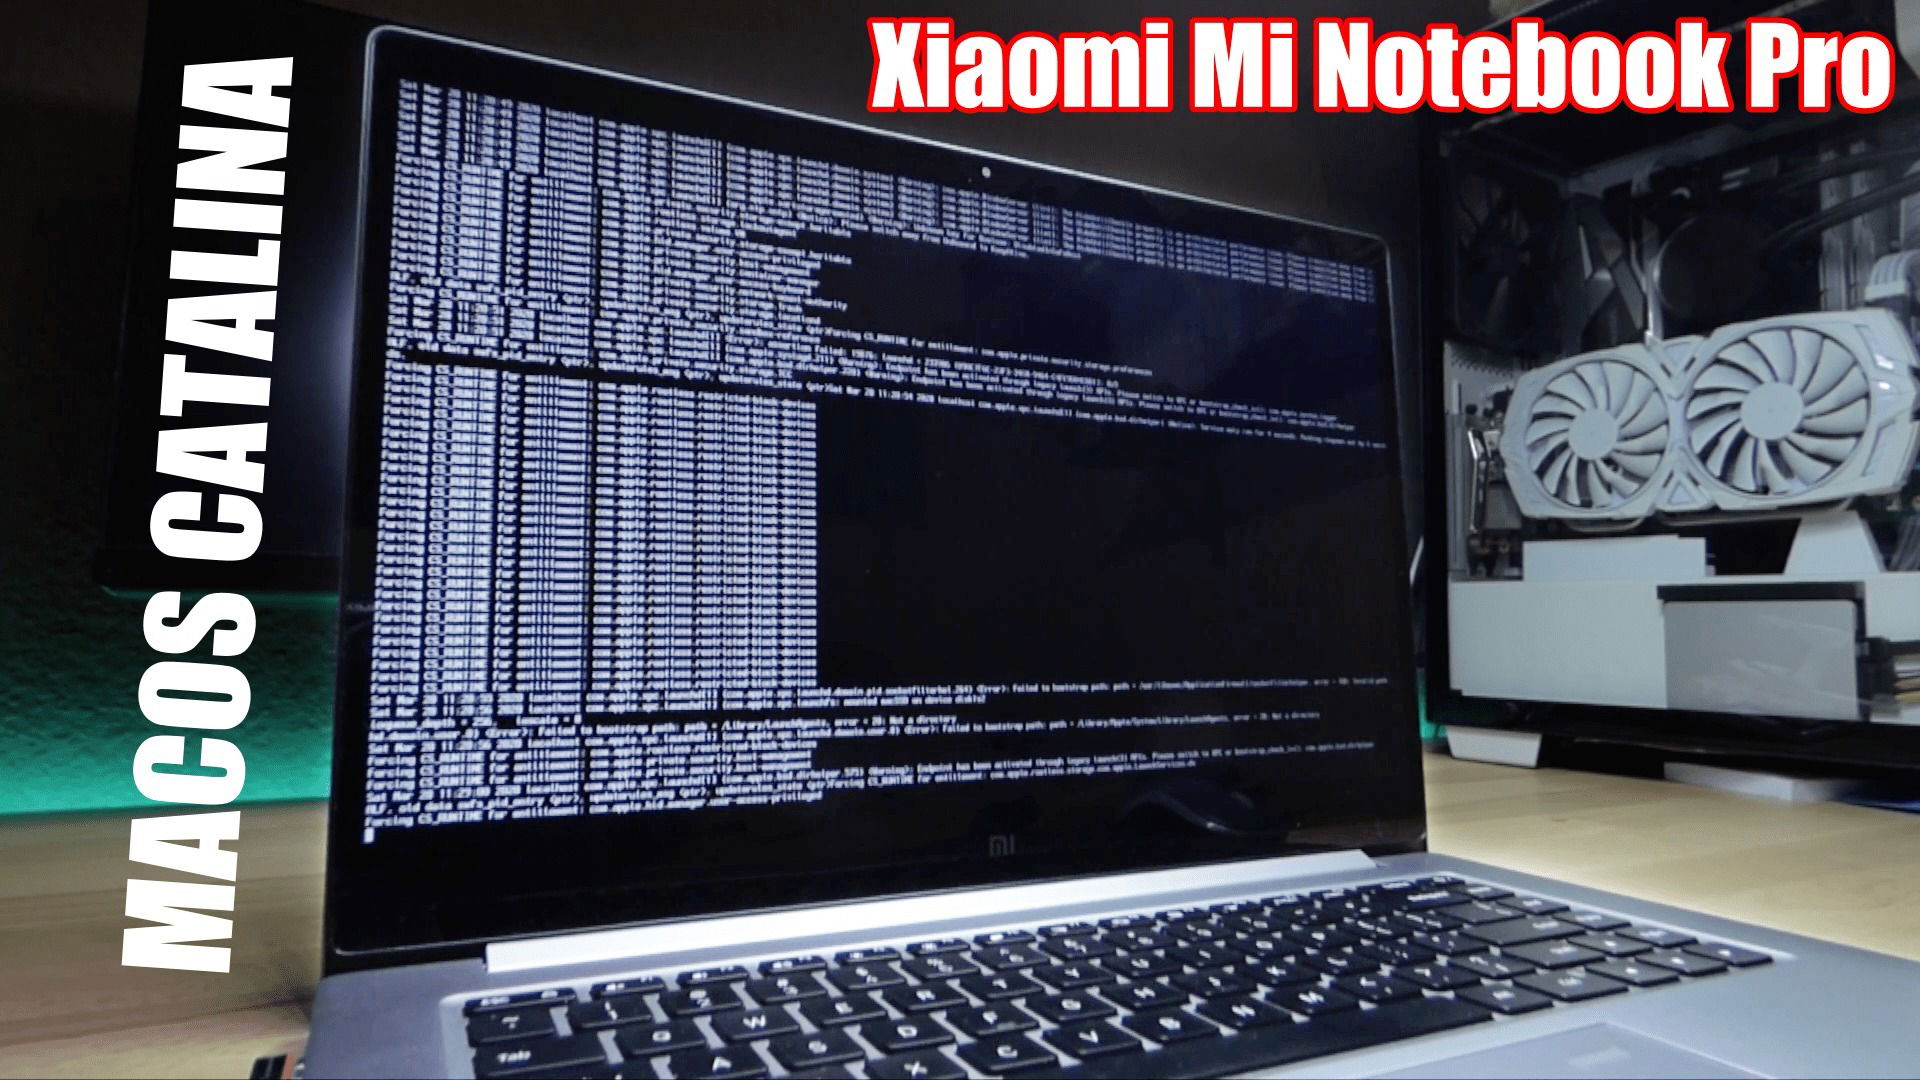
I want to make this step-by-step guide for all those who want to install macOS on this laptop.
There are several guides on others websites, but they are from older versions (High Sierra) and I have tried them and at least they have not worked for me to install Catalina.
So I want to explain how I managed to install Catalina macOS without the need for a MacBook to create the boot disk and show you.
This guide is based on daliansky's GitHub post. I leave you the link: https://github.com/daliansky/XiaoMi-Pro-Hackintosh.
I have also created a vido on Youtube explaining the procedure step by step: https://www.youtube.com/watch?v=rfG4sGwhE2g
THINGS THAT DON’T WORK
Unfortunately, there are two things that are not available when using macOS:
- The graphics card included with this laptop, an MX150, does not work. A few versions ago, Apple removed support for Nvidia's graphics cards, so it can't be made to work.
- WiFi doesn't work either, since the intel chip integrated in the motherboard is not compatible with the chips that support macOS although, as far as I've read in different forums, in a few months it will be possible to use it. In the meantime this problem can be solved by buying an external WiFi USB of this type: link.
For the installation of macOS you need the following things:
HARDWARE
- A USB where we will create the boot disk. It has to be at least 16 GB as the catalina image takes up more than 8gb.
- A new SSD where we will install macOS. What we get by installing macOS in another SSD apart from Windows SSD is to be able to choose between which operating system we want to use every time we turn on the computer, through the Dual Boot that we will install. I have used a Samsung 970 EVO Plus 500Gb, I recommend this for its high speed both writing and reading, I leave the link.
- A USB WIFI since, as I said before, the integrated WiFi does not work. You can use an Ethernet cable as well.
- We will also need the Xiaomi Mi Notebook Pro.
SOFTWARE
As far as the programs and files we're gonna need are:
- balenaEtcher: with this program we will create the boot disk with the USB.
- The image of Catalina that you can download here. You have to download it from the link below.
- Clover Configurator: once we install macOS we will modify the EFI folder with this program. You can download it here.
- EFI Folder: you can download it here. En Assets, the tenéis que descargar la que pone XiaoMi_Pro-OC.
INSTALLATION
INSTALLING THE NEW SSD
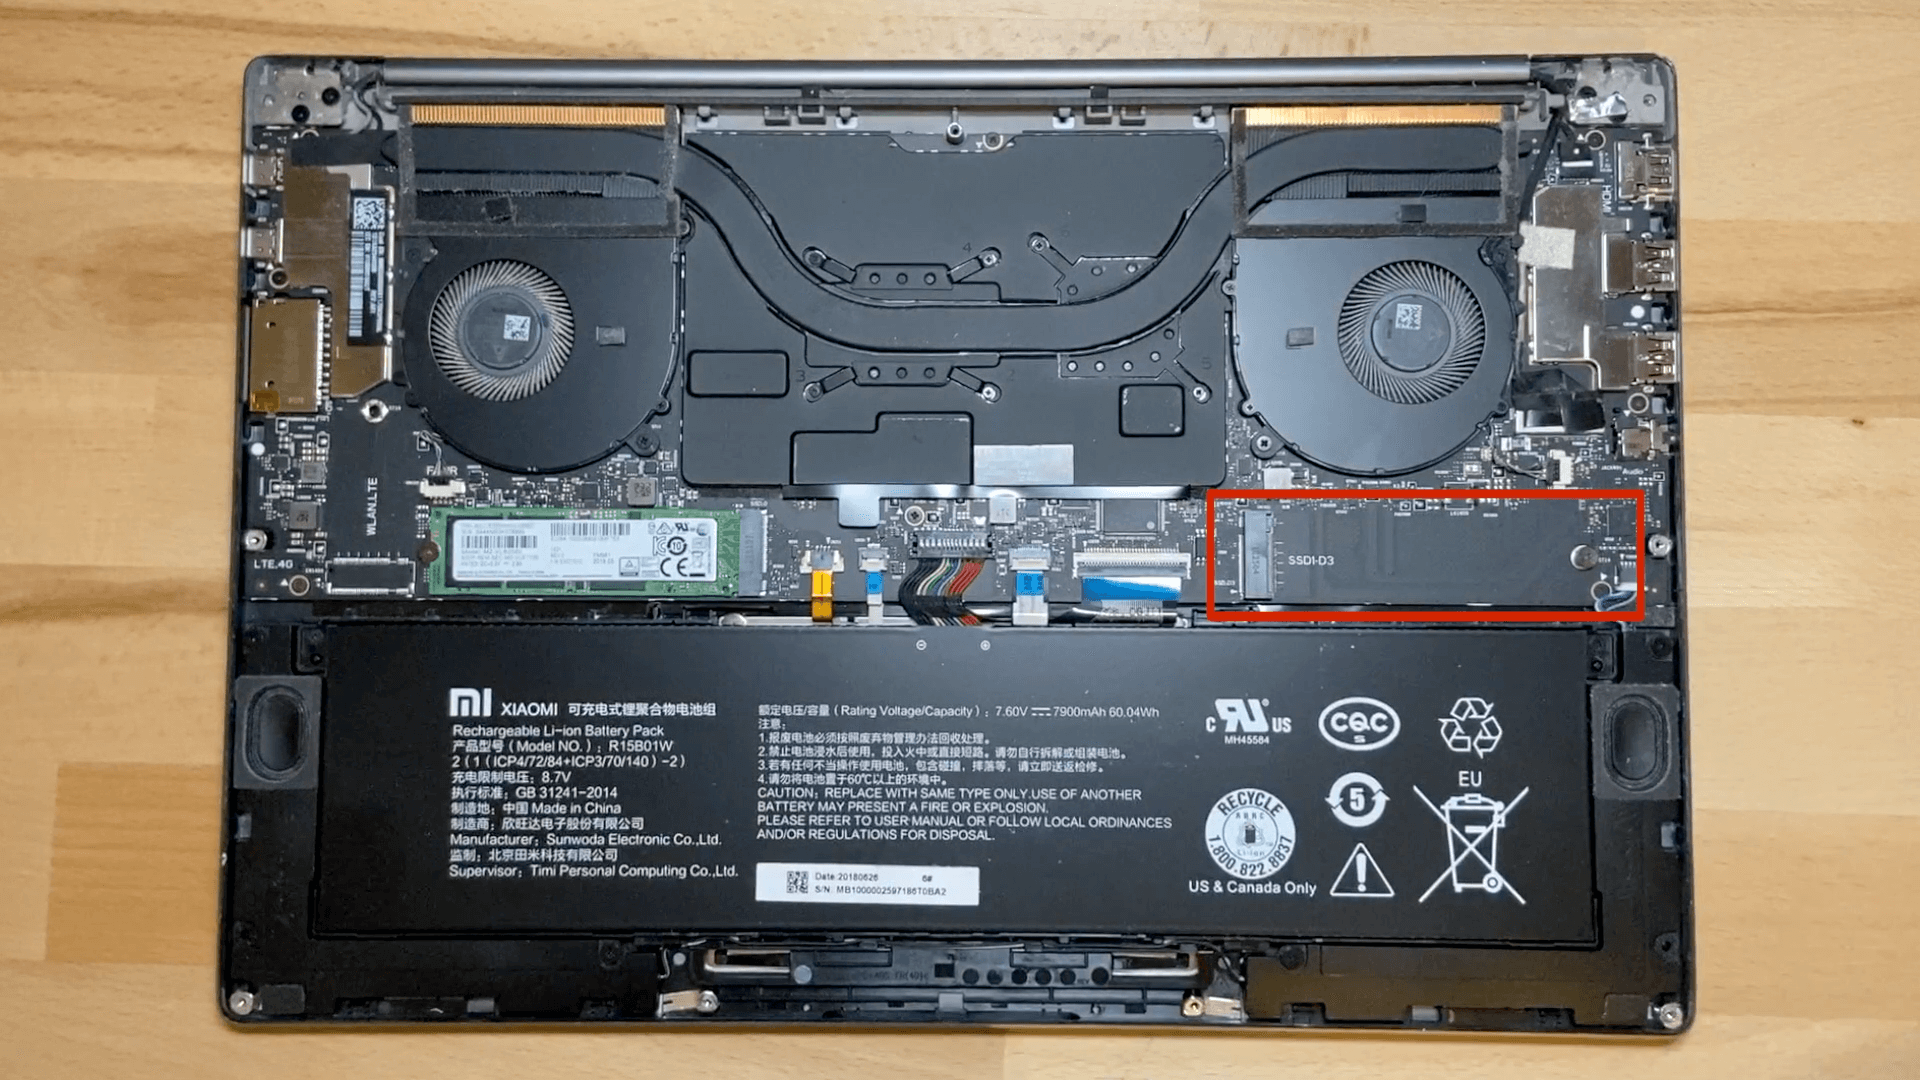
To install the SSD we have to remove the back cover first. To do this, we use a screwdriver to unscrew all the screws that hold it in place. Once they are removed, use a suction cup to remove the tabs that hold it in place. You have to force it, otherwise it won't come out. Once we see the motherboard, we insert the SSD into the empty slot on the right. Once it's in place, we put the cover back on and screw the screws in.
BOOT DISK
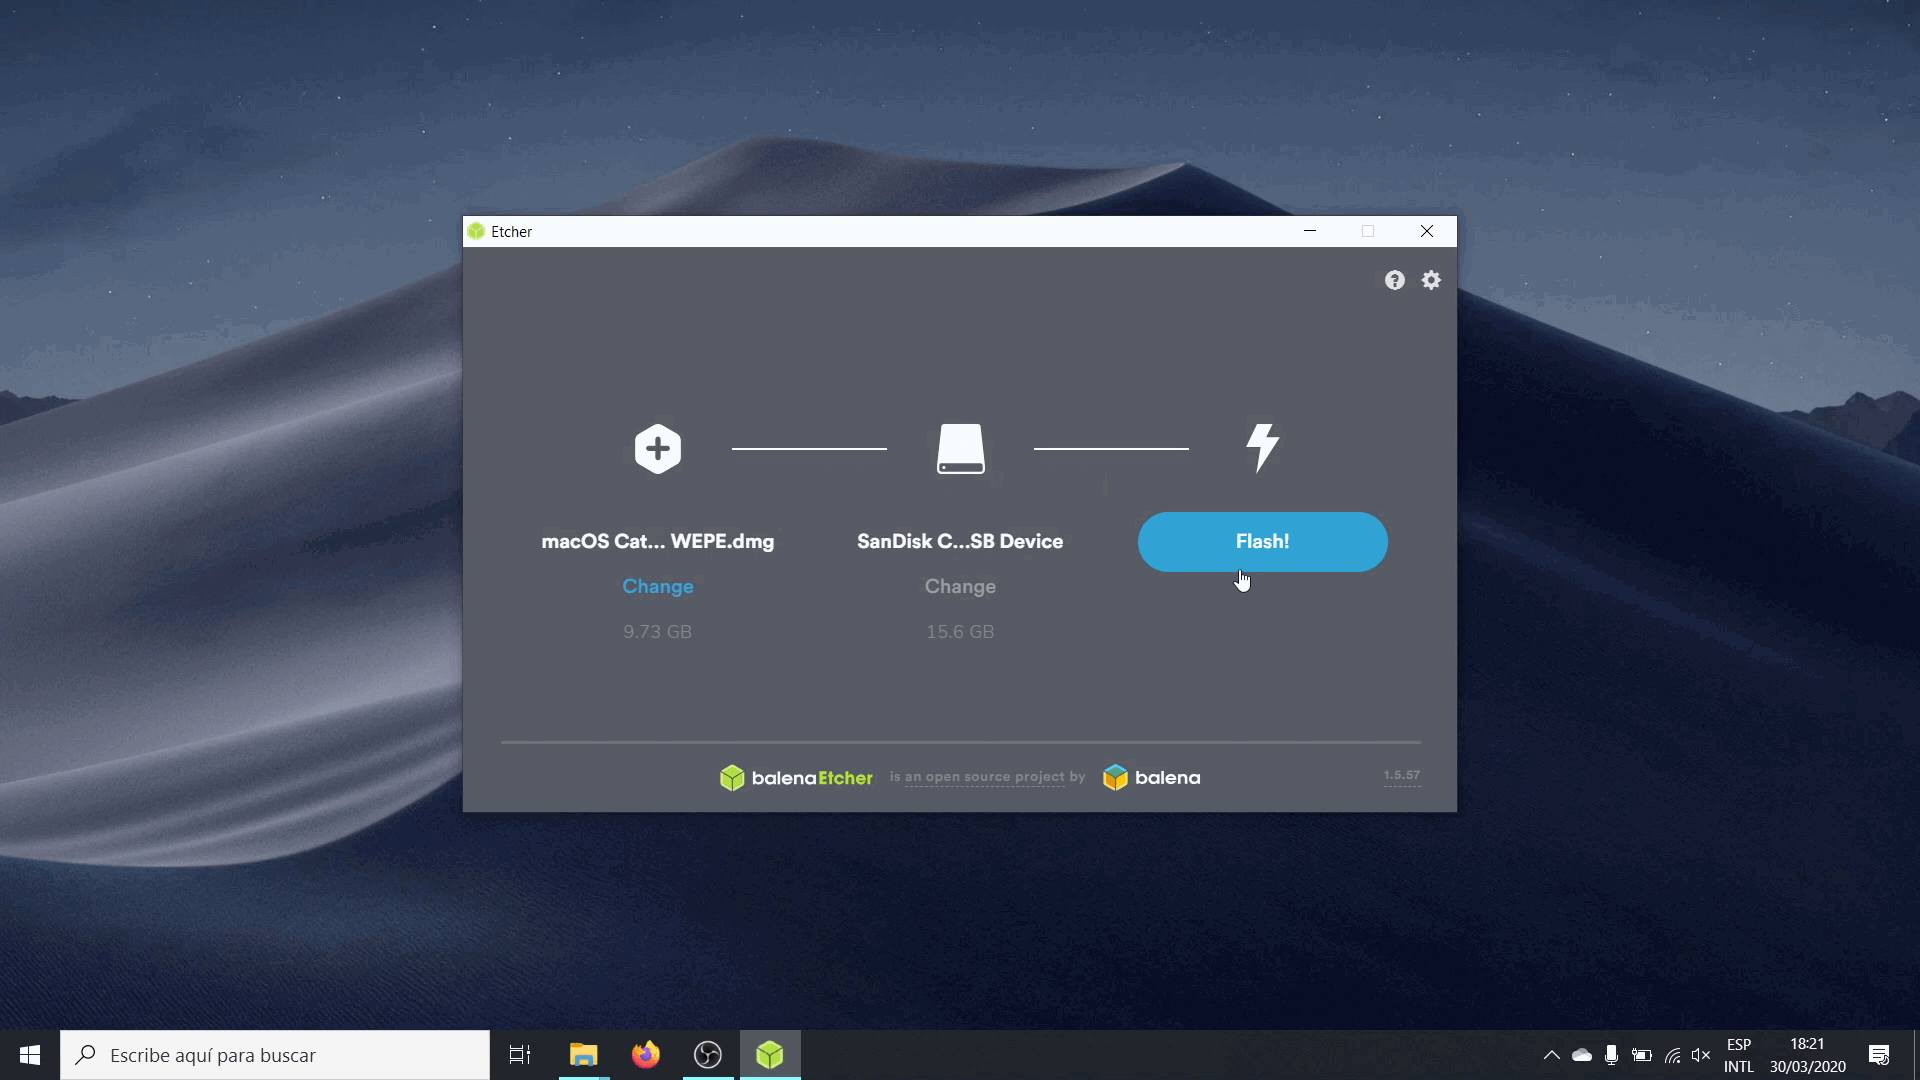
The first thing we have to do is format the USB. Then, after downloading the Catalina image and the balenaEtcher program, we have to create the boot disk. To do this, you open the program, and once in it, you select the image of Catalina and your USB. Then you give it the Flash option and it will start burning the image to the USB. This process will take about 20-30 min. When it's over we can eject the USB and turn off the laptop.
CONFIGURATION OF THE BIOS
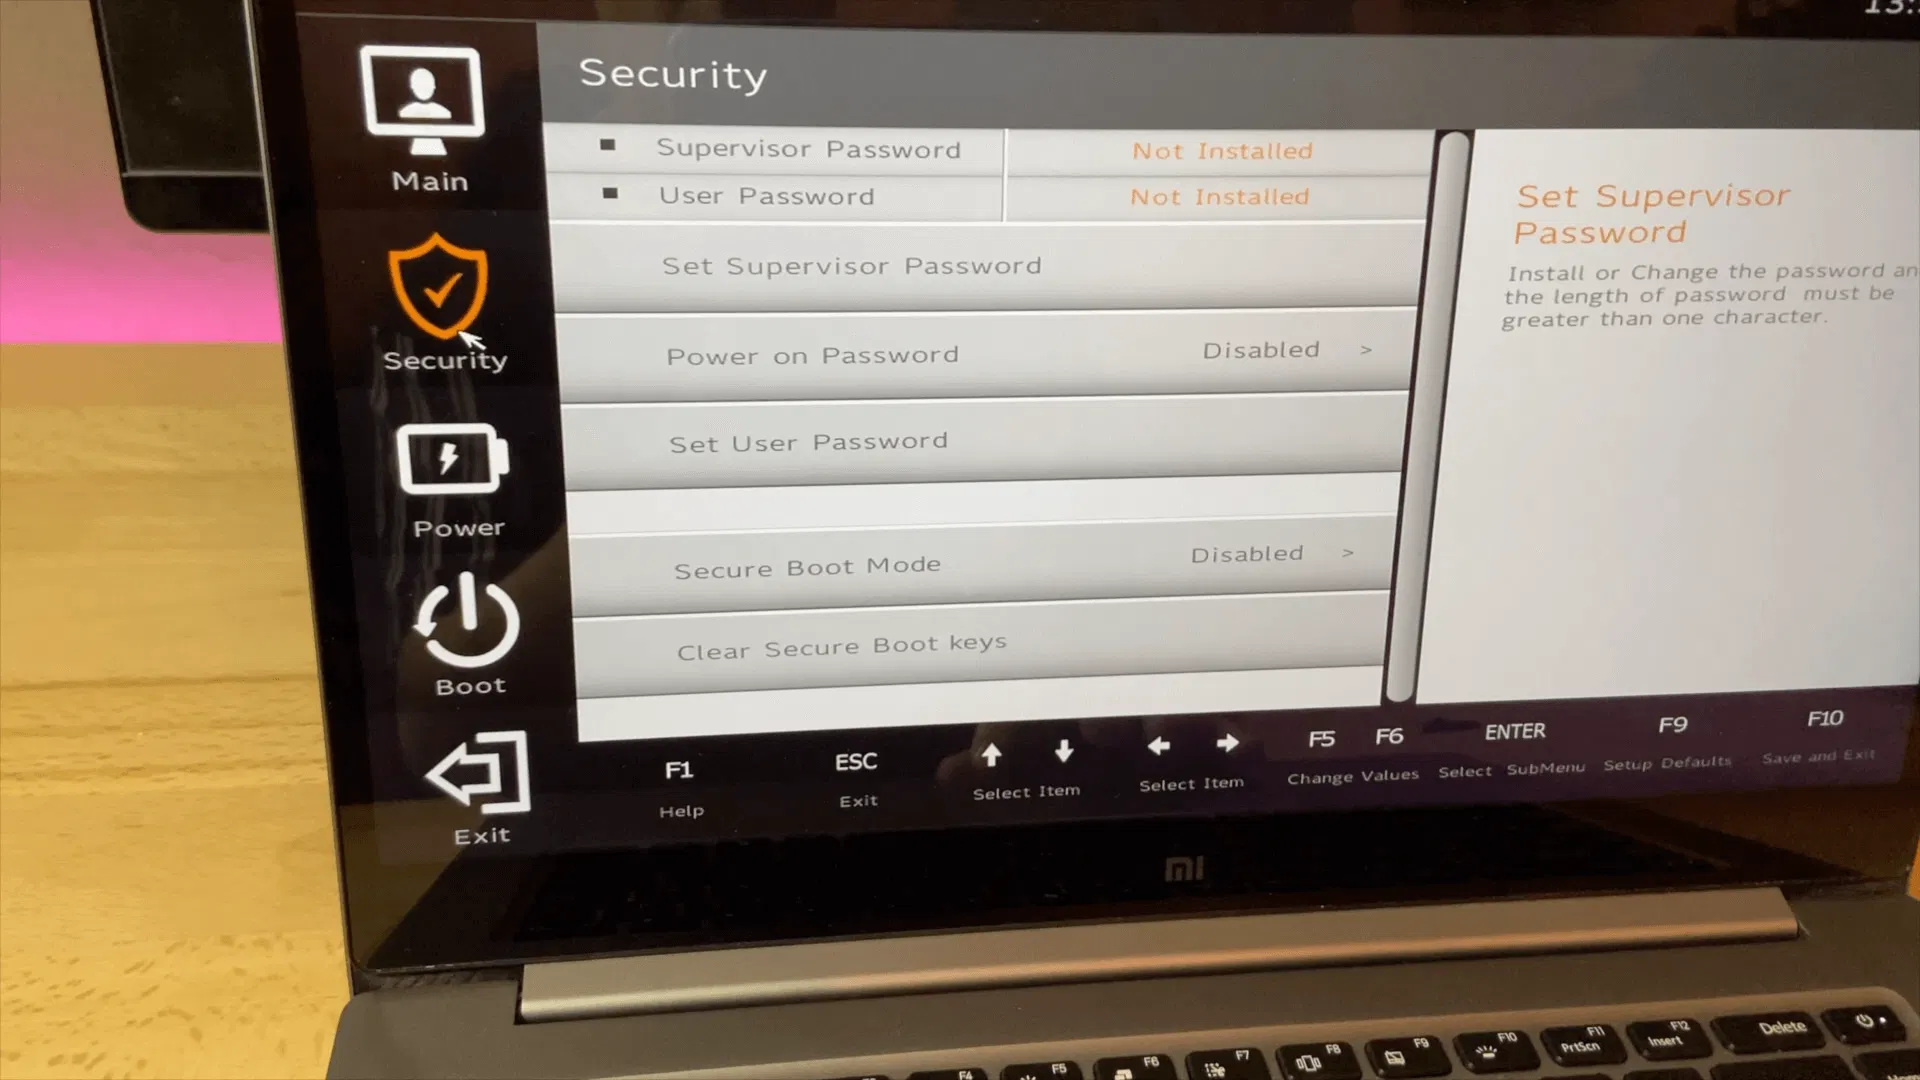
Before we start installing Catalina macOS, we have to make sure we have some specific parameters in the BIOS. To do this, we have to turn on the laptop by pressing F2 repeatedly until it takes us there. There, we have to go to the Security section and make sure we have the Power on Password set to disabled and the Secure Boot Mode set to disabled as well. Now, we go to Boot, and we have to set the Boot Mode to UEFI and the USB Boot to Enabled. With F10 we save the changes and exit.
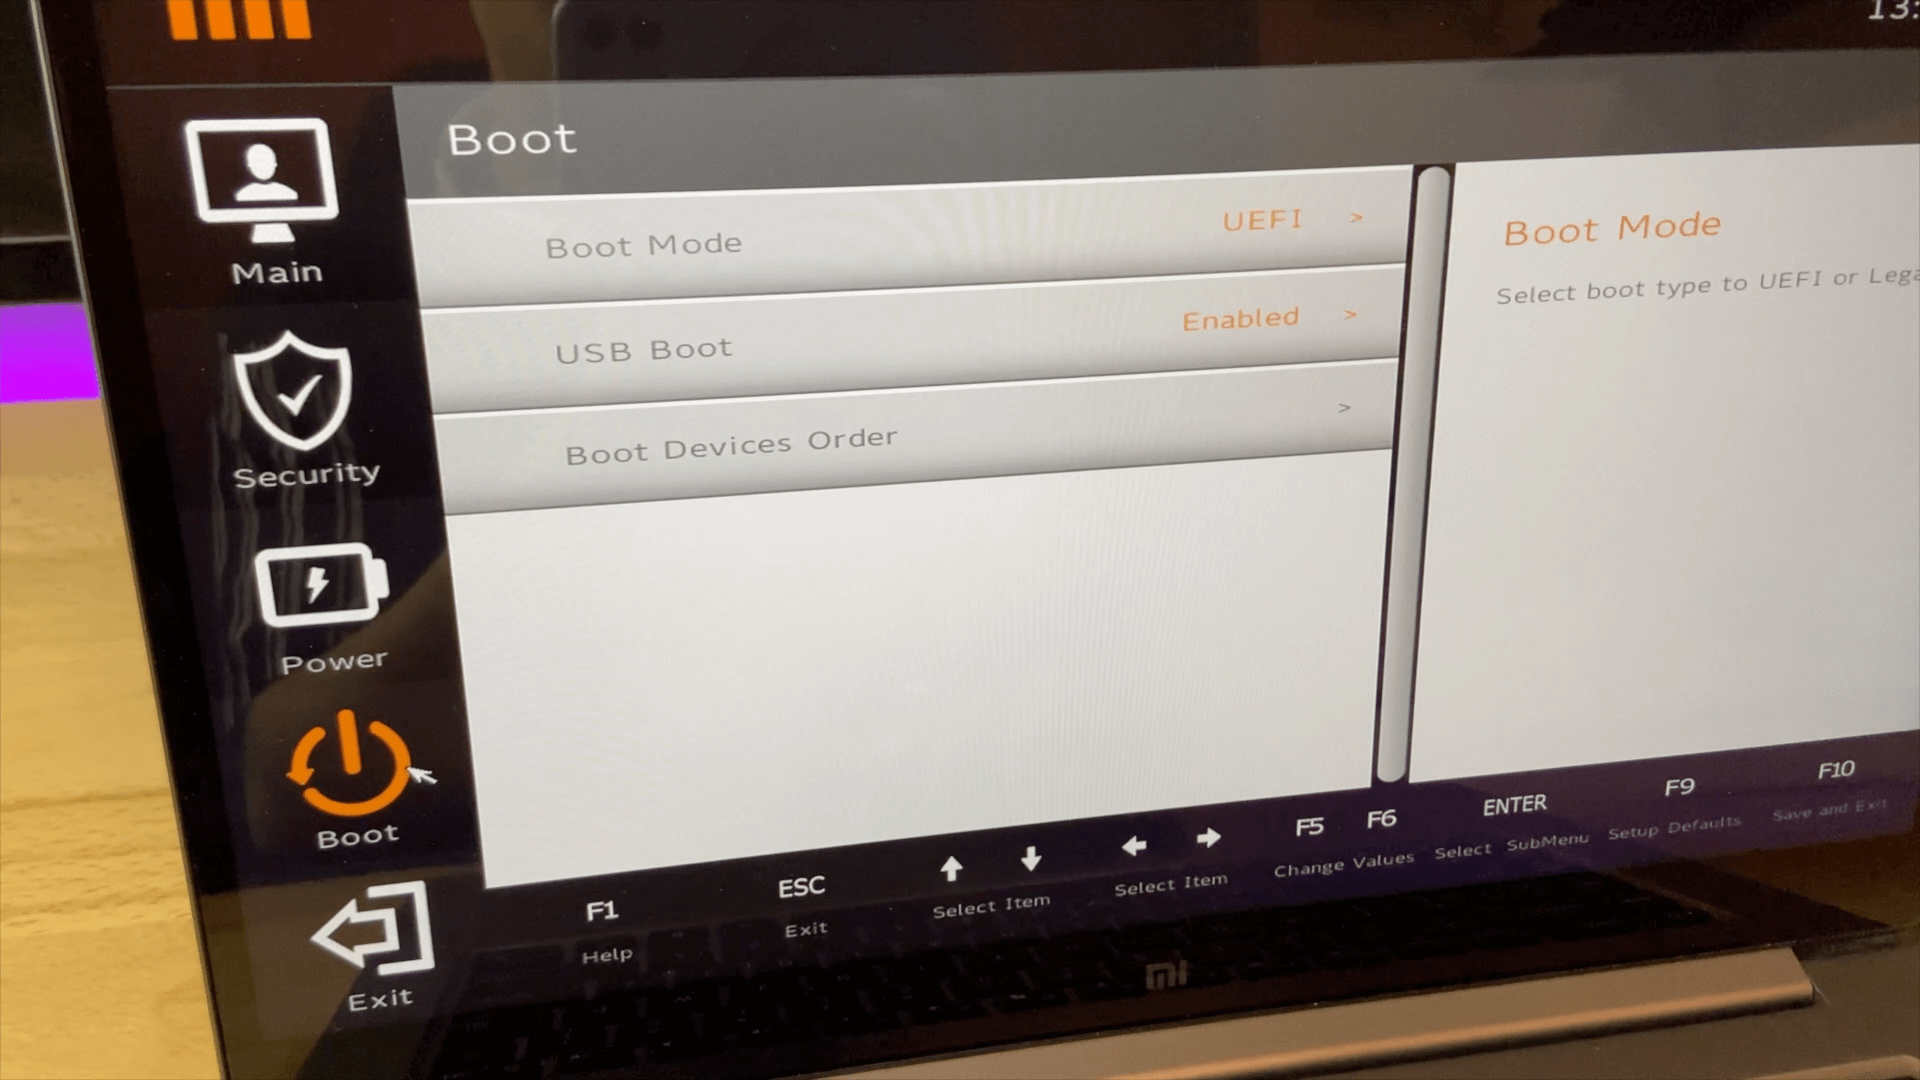
INSTALLATION
Let's go now to the Catalina macOS facility. With the computer off we have to turn on the laptop by pressing F12 repeatedly until it takes us to the boot manager. Once there, we click on our USB, if it comes out repeatedly, we hit the one that doesn't have one.
That will lead us to the Dual Boot, where we can choose whether to continue with windows or the Catalina macOS installer. We give the latter and that will lead us to the configuration of the installation. It will not let us use the TrackPad so we have to connect an external mouse. Select Disk Utility and in here we have to select our SSD that we have installed new and give it the option of Erase. We put the name we want for example "macSSD", the format we put it as macOS Extended (journaled) and in the one below we select Map Partition GUID. Once formatted, close the window.
When we are in the menu again, we have to give Install macOS. We click on continue and choose our SSD that we have just formatted. We continue and start installing macOS on the SSD.
The laptop will restart, when the installation is finished, in windows. We restart it again by pressing F12 to go to the boot manager and select our USB and enter the Dual Boot. There, we must have left another option, which is Install macOS from (the name of the SSD that we have put). Select it and start the installation. It will last about 20 minutes and will reboot several times. Each time you reboot, we must reboot the dual boot by entering from F12 and our USB and give the logo before (Install macOS from the SSD).
The last time it is rebooted, it will take us to the operating system configuration. We configure it to our liking but we have to select obligatorily not to connect to Internet (the WiFi does not work) and not to transfer data from another MacBook.
DESKTOP CONFIGURATION
When we finish the configuration, we will get the macOS desktop. Once here, we have to download the Clover Configurator program and the EFI folder that I have linked to you previously. Open the Clover and go to the Mount EFI section on the left sidebar. On this screen, mount your SSD partition and, in the window that opens, replace the EFI folder it contains with the EFI folder that you must have downloaded. Close the window, unmount the partition and close the program.
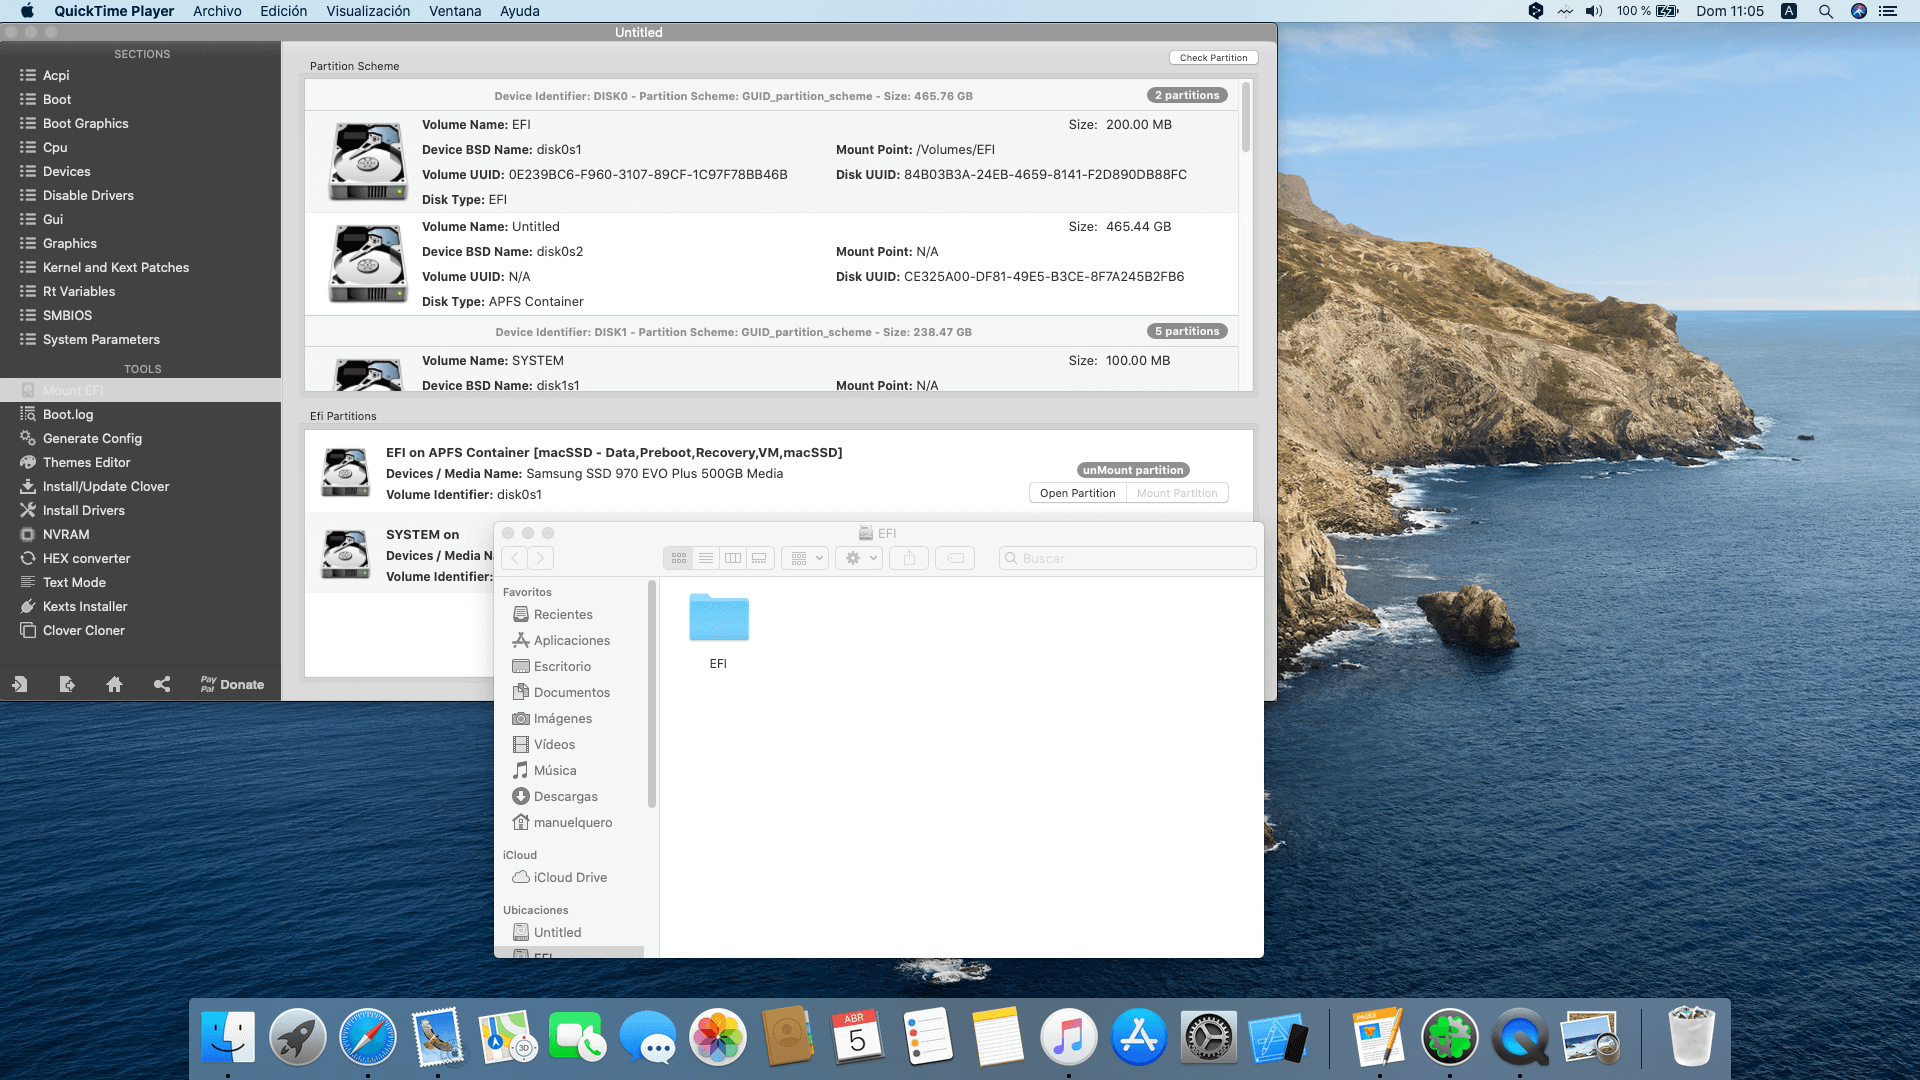
All that remains is to set up the TrackPad. To do so, we go to settings and click on the TrackPad section. Once there, we have to select 'Touch to click' and remove the 'hard click and touch response’.
Once the TrackPad is configured, we can eject the USB and turn off the computer.
BOOT ORDER
Finally, we have to change the order in which the disks are started. To do this, we have to enter the BIOS with F2 and go to the Boot section. Select Boot Devices Order and put in first position the SSD, where we have installed macOS Catalina.
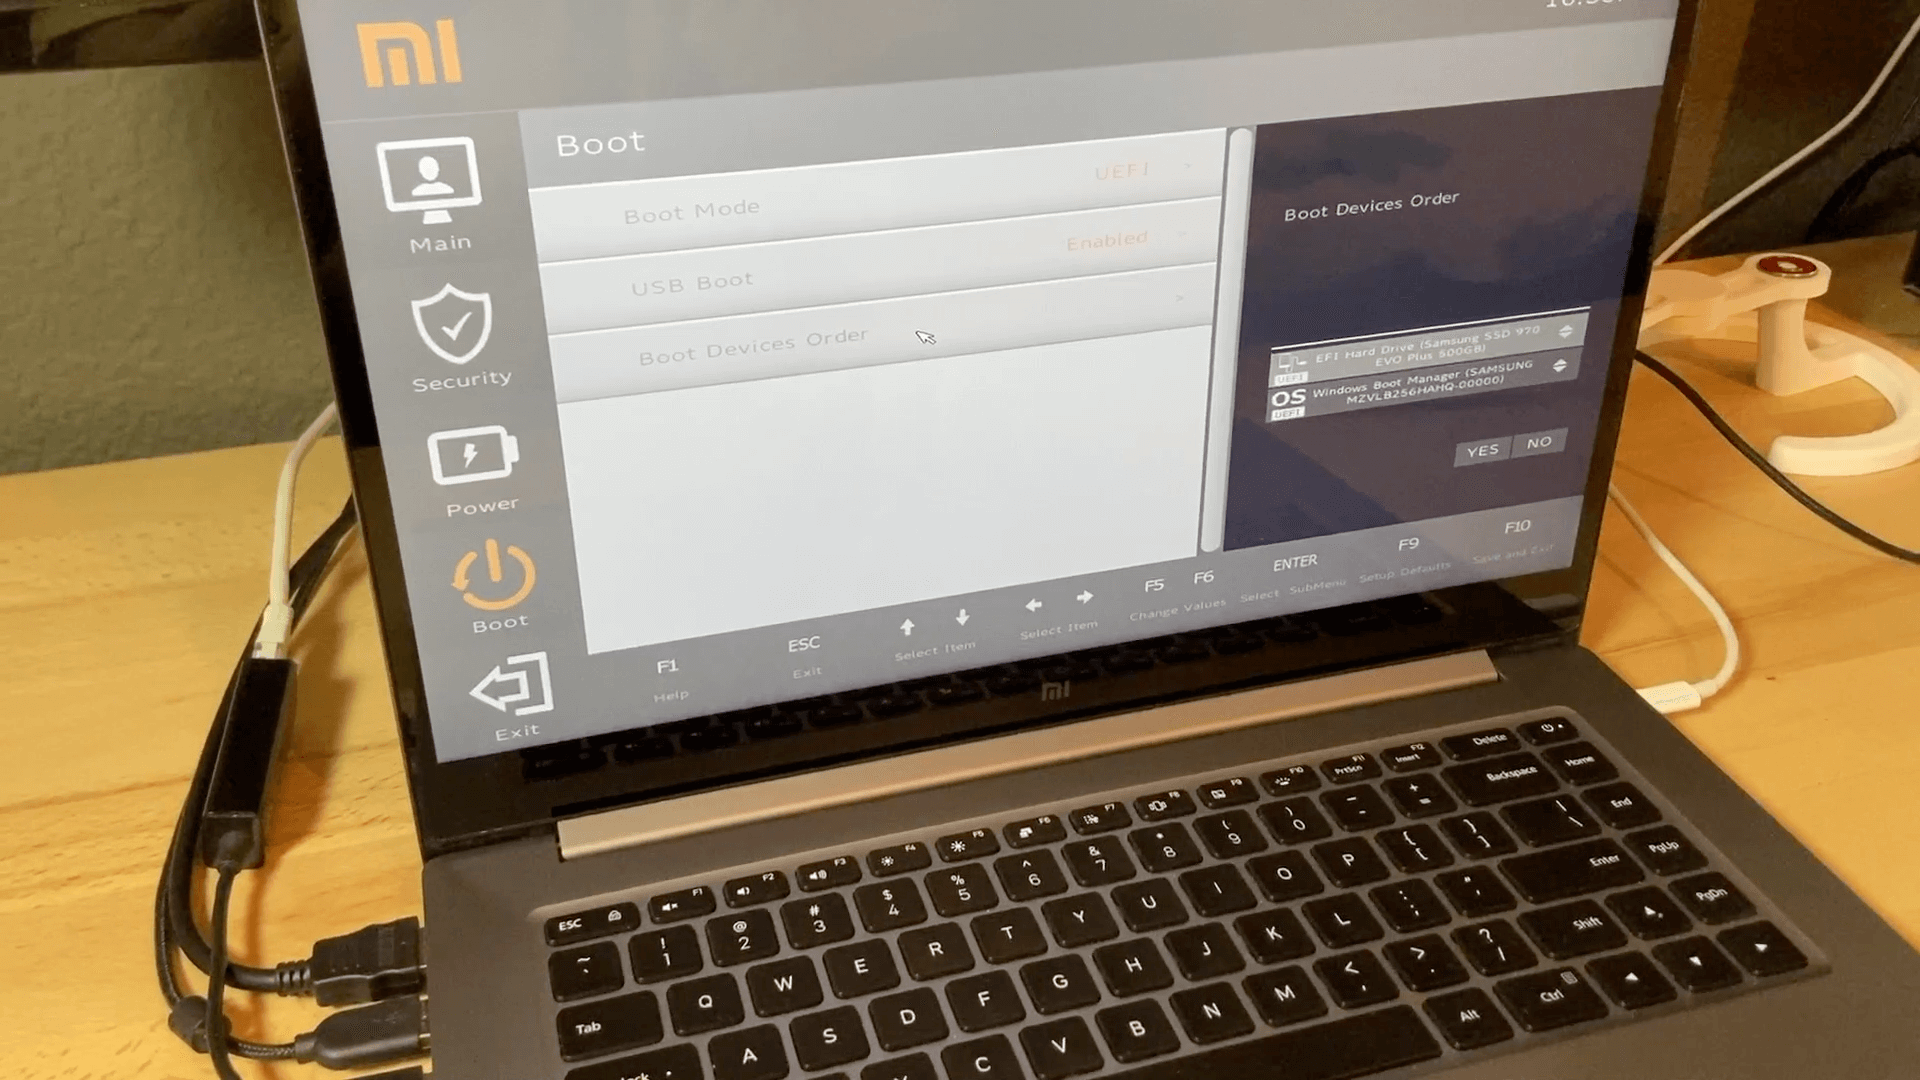
We would have already installed and configured Catalina macOS and running at 100%. Now, every time we turn on the computer, it will take us to the Dual Boot, in which we can choose whether to start with Windows or on the contrary with macOS.
I want to remind you that I have a video uploaded to Youtube in which I explain step by step this same procedure in case you have any doubts. I'll leave it with you:
